
人脸识别接口文档
一、体验产品
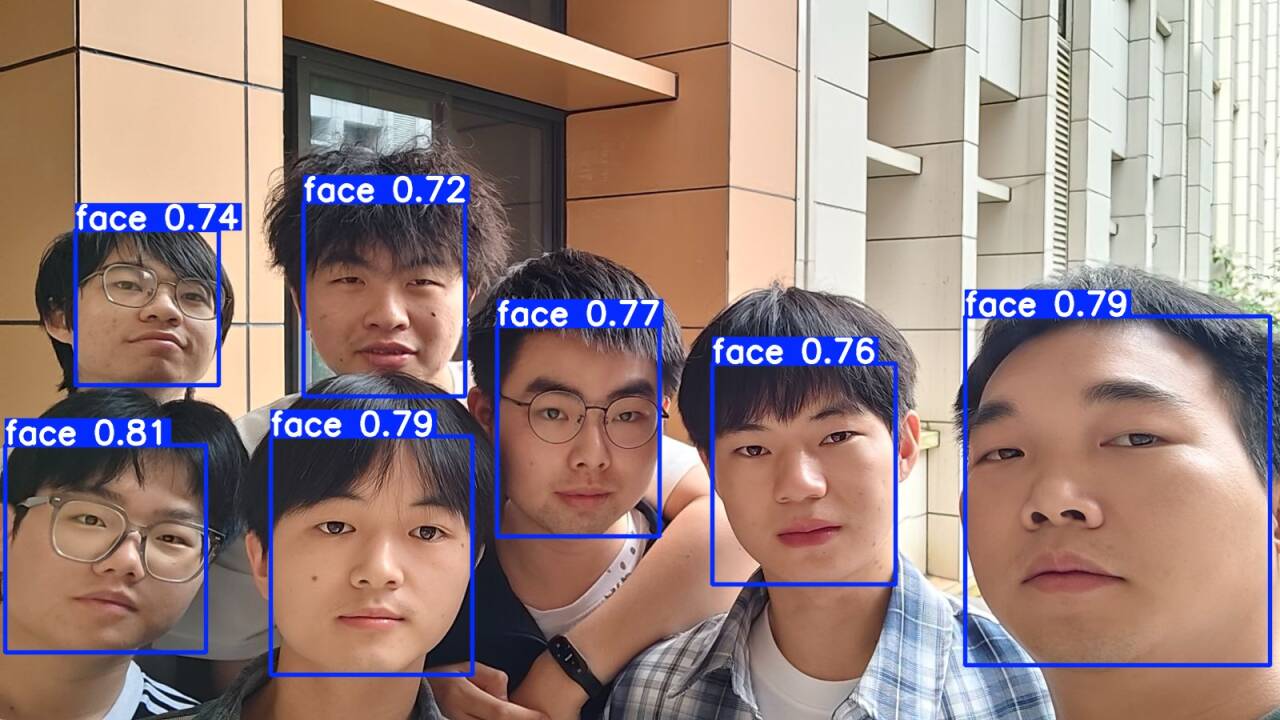
原始图片:
识别结果:
开启摄像头进行实时人脸检测
硬件状态:摄像头准备就绪
二、API 接口说明
基本信息:
请求类型:HTTP/HTTPS。请求方式:POST
接口地址:https://www.giggity-iot.cn/predict
接口描述:
人脸检测,此接口多用于调用人脸识别、人脸比对的接口之前,用于从图像数据中检测出人脸区域,并以矩形框+标签形式返回人脸检测结果。目前该接口仅供测试使用,调用该接口暂时不限制调用次数。
本地调用示例 (Python):
# 人脸识别接口 Python ===
import cv2, requests, base64, urllib3
import numpy as np

# 1. 配置云端 API 地址与待检测图片
url = "https://www.giggity-iot.cn/predict"
img_path = "face.jpg"

# 2. 读取并进行自适应压缩
img = cv2.imread(img_path)
if img is None:
    print(f"找不到测试图片: {img_path}")
    exit()

h, w = img.shape[:2]
if max(h, w) > 1280:
    scale = 1280 / max(h, w)
    img = cv2.resize(img, (0, 0), fx=scale, fy=scale, interpolation=cv2.INTER_AREA)

# 3. 将图像直接编码为二进制字节流并同步发起 API 请求
_, buf = cv2.imencode('.jpg', img, [cv2.IMWRITE_JPEG_QUALITY, 85])
img_bytes = buf.tobytes()

print("正在发送二进制数据流到云端网关...")
try:
    # 使用 data=img_bytes 发送 Raw Body,verify=True 忽略本地证书验证
    res = requests.post(url, data=img_bytes, verify=True).json()

    if res.get('status') == 'error':
        print(f"服务器返回错误: {res.get('message')}")
        exit()

    # 4. 解析 API 返回的已标记结果图
    res_b64 = res['processed_image'].split(',')[1]
    res_img = cv2.imdecode(np.frombuffer(base64.b64decode(res_b64), np.uint8), 1)

    # 5. 窗口等比例缩放显示
    win_name, max_h = "AI-Result-Preview", 720
    h, w = res_img.shape[:2]
    if h > max_h:
        w, h = int(w * (max_h / h)), max_h

    cv2.namedWindow(win_name, cv2.WINDOW_NORMAL)
    cv2.resizeWindow(win_name, w, h)
    cv2.imshow(win_name, res_img)
    print(f"检测成功!画面中人数: {res['human_count']}")
    cv2.waitKey(0)
    cv2.destroyAllWindows()

except Exception as e:
    print(f"请求失败: {e}")
调用结果: